Little Red Riding Hood's Fairy Tale Woodland

{Beach Bungalow Designs}
This whimsical room began when my client decorated a Christmas tree using a Woodland theme for her daughter's nursery.

{ Client's Christmas Tree}

Inspired by the tree, she decided to decorate her daughter's now big girl room with either a Little Red Riding Hood theme or a Woodland Theme with Little Red Riding Hood accents.
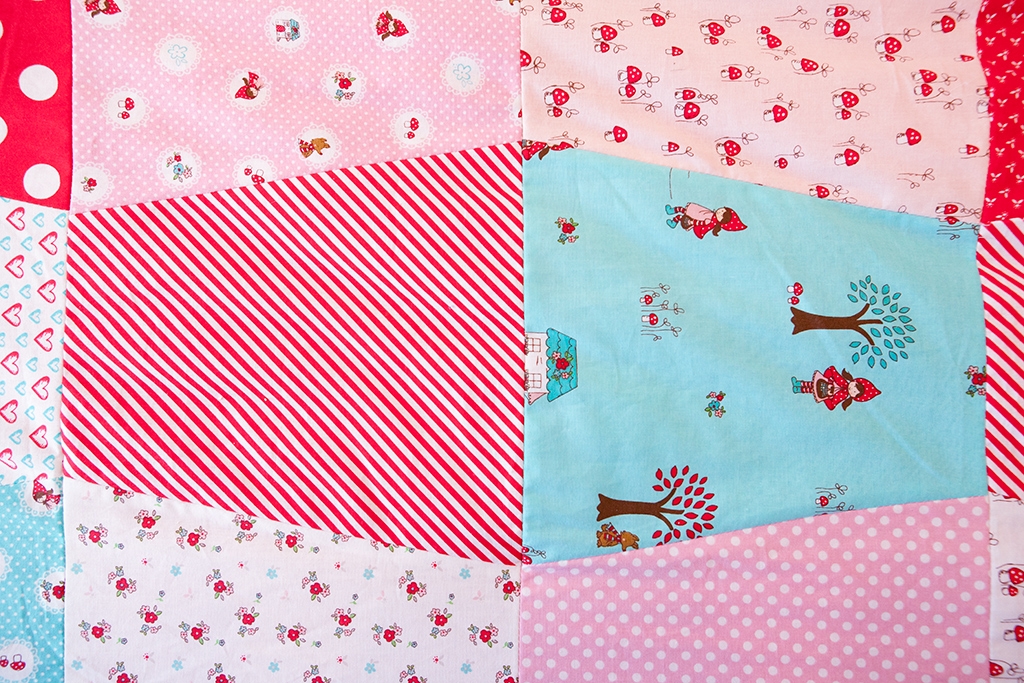

In order to compliment the whimsical and bright fabrics used on the bedding, we decided to use something more simple for the window treatments. So, we came up with a neutral khaki gingham with subtle red banding for the accent.

{Custom Bedding and window treatments by Beach Bungalow Designs}

As a personal touch, we added this lovely twig detail. Hanging from the twig using jute twine are letters custom painted to match the fun fabrics used for the bedding.


 This cuckoo clock perfectly captured the theme of this room, not to mention the colors! The mushroom detail at the bottom of the clock seemed to perfect.


Check out these custom painted canvases by Lauren! And this white branch light that fits perfectly with our Woodland theme.

{Custom Canvases by Lauren Heinle}


Here's a closer look at the tree wall mural with three dimensional jersey cotton flowers and our branch chandelier that reflects a whimsical pattern on the ceiling.
{Chandelier available through Beach Bungalow Designs and Wall Mural by Lauren Heinle}


One last look at this wonderful Woodland room, the dollhouse structure of the bookcase looks just like a little Alps cottage. Our custom furniture company made it especially for little Ainsley with red detail to add a more whimsical appeal.

Special thanks to my clients Kyle and Amy for using me to decorate this fun room. And as always we are here at the Bungalow to decorate your child's room! Keep checking back for more custom designs like this Woodland Room with Little Red Riding Hood Accents!


Averey's Alice in Wonderland Adventure: Before and After


{After Gaier Project}

{Before Gaier Project}
 The Gaiers hired me to transform a room for their two year old Averey and started with a painting and a bed only. They were having a new baby girl in a couple of months so they wanted to transition Averey into a big girl bed so the new baby could take over the nursery.

{ Custom Curtains by Beach Bungalow Designs}


The room was to be designed around this Alice and Wonderland piece of artwork that Aaron had purchased for Kim. We decided to pull the purples and greens out of the painting as our main palette with accents in the metallics and blues. The fabrics we decided to keep sophisticated and dressy. We added fluffly brushed trims and jewel embellishments to the pillows for a more custom appeal. We repeated the metallics through out- in our frame for the picture, hardware on the windows and the stripes ( Lauren Heinle Murals) on the back wall behind the bed.

{Custom Bedding Beach Bungalow Designs}


{ Custom Painted Letters }

A custom painted wood monogram highlights the wall over this dresser. Lauren pulled the patterns from the bed and painted them in the same colors. The rug was a highlight for me. This rug has cream and green ultra suede leaves that mimicked the tree in the picture. The texture was super soft for Averey to play on and probably my favorite thing in the room!


The side table was painted in a green color for a bold pop beside the bed. We also customized the lampshade that is on the table light. We attached a piece of ribbon around  the shade then placed a rhinestone brooch to hold it. I have to thank Kim for the creative idea!

{ THANKS to Stacy Bryant Photography for all the amazing pictures!}
Averey's room was very fun to design. Aaron and Kim were super excited and very easy to work with. We had such a blast at every stage and I'm grateful they chose me to help! As always we are here at the Bungalow to help you design your dream room too!


The Cake Lady: A-Tisket, A-Tasket, It's an Easter Basket!


I'm so excited to share another awesome post from my good friend The Cake Lady on decorating Easter cupcakes with your kids.  Cherish all those special memories with your family this weekend. Happy Easter from the Bungalow!! Enjoy!

Easter is such a wonderful time! Everyone enjoys a basket full of goodies! 
Grab some friends, family, or the kiddos and enjoy some quality baking time together! 

Here is a very simple little Easter treat that will brighten up anyone's day!

Items you will need:
Vanilla cupcakes
Vanilla frosting 
Green food coloring
Twizzler sour twists( I found them at Albertson's) or any licorice 
Tooth picks
Jelly beans or chocolate eggs
 

Dye the frosting green and frost the cupcake. You have the option to hold the knife, flat side down, and pull up quickly to make the frosting spiky (like grass).


Now you will need to cut your Twizzlers in half. You will insert a tooth pick into either end of each Twizzler half.
 
 
Now, you will put your eggs in your basket. 5-6 jelly beans fit just right. Finally, take your Twizzler half and insert the tooth pick ends into the cupcake for the handle.


These cupcakes are truly so simple. I had 1st graders, 3rd graders, and 4th graders all make them today at my children's school! They will certainly brighten up any Easter festivities you have planned! 

Closet Envy


{ Pottery Barn Kids}

This was the "inspiration" picture that my client Stacie gave me to transform her closet from typical to a focal point of design in the room. I think there are so many positives to using your closet in this form! If you have a smaller room, you can move your changing table inside the closet allowing for more space for a chair, crib, bed etc.. Build a bookshelf inside your closet, this allows for display shelving that you may not have had room for in the main part of the room. Your possibilities are endless!!
On a budget?? Use furniture pieces instead of having someone create custom units to fit inside. Its all in the details so make sure you accessorize to make the decor come together.

{BEFORE}
 This space is going to be a Nursery for 2 little girls. A newborn and a one year old. Since the girls are so close together in age, we will have 2 cribs in the room. Thinking we were going to need some space saving ideas, my client Stacie thought the closet would be a good place to build out. 

{Pre-existing dresser}
{Wallpaper selection for back of the closet}
 Once we decided to use her double dresser in the closet. I came up with this silver damask wallpaper to line the back of the closet.  Her color scheme is going to be gray, pink and white so I wanted something with a metallic sheen to reflect light.

{ Mirror shelf for over dresser}

 My client really liked the look of the window over the dresser in the inspiration picture but we didn't have one in the actual space. I found this mirrored shelf that will provide a similar effect!


{ Construction started!}

 This week my client got excited and tore out the closet herself!!.. while she is 8 months pregnant- ROCK STAR!  Stay tuned for the completed product post coming soon!!


A "Knobby" Idea

{Now available at our store}
I am so excited about our new knob line that Country Cottage just sent to us!  I am feeling so inspired to add different knobs to client's pieces as well as my own kids dressers. I think the right knob can completely transform a piece of furniture. Here's some different styles to inspire you..

{houzz}

 I can see this knob on a vintage white dresser in a sophisticated girl or boy nursery. Love the silver pattern and bright pop of color behind it.

{Pinterest}

 The typical glass knob is no more! There are so many different styles available now then when I first started decorating. Try an oversized version for something different!

{Etsy}
 Hand painting knobs is a fun project for you and your child. You can personalize each knob with an initial or take a theme from your room and incorporate it. 

{36th Avenue}
 Step outside the box! These knotted rope knobs are so inspired. I can see these transcending any age or theme. I'm keeping this idea for my next nautical project!!

Enjoy your weekend! and as always we are here at the Bungalow to help you!

Curtain Passion!


{Castaway to Couture}

 If there is one thing that I think should NOT be left out of a kid's room, its a window treatment. It adds a huge design element to the room as well as warming up the space. I consider it a design crime to leave them out unless absolutely necessary! There are many ways to create a window treatment under any budget. Here are some fun ideas for you to splurge or save on!!


{itsy bits and pieces}
Buy a relatively plain curtain and add a fantastic tieback. Purchase a flower and attach to ribbon. OR make your own by bundling fabric together.


{Decorpad}
Buy or have made a simple white flat roman shade and add a pop of color. Attach a ribbon or colored fabric band around the edge of the shade. Modern simplicity elevated!

{pinkwallpaper}


This style is a go to for me. When my client is on a budget and wants functional curtains, I suggest buying plain ready-made panels and having us add a fun banding fabric down the sides and around the hem. You can apply the bottom hem fabric in all different sizes ranging from a 2" band to 22".


{mstephensinteriors}


Splurge! I love a shaped cornice board with curtain panels hanging down. You can make the curtain panels so they are just standing panels which means they don't open and close but still provide a decorative accent. Add a tassle or bobble trim down the hem for a decorative accent.

{Elements of Style}

 Another splurge!! Have a decorative valance made that frames your window. So many fun styles and fabrics can be used. If you have a busier rug or wall pattern its a nice way to add another texture without overwhelming the space with a whole curtain panel of fabric.

Its time for you to finish your space off with a fun window treatment and as always we are here at the Bungalow to help!


Ella's Spot


{Beach Bungalow Designs 2013}


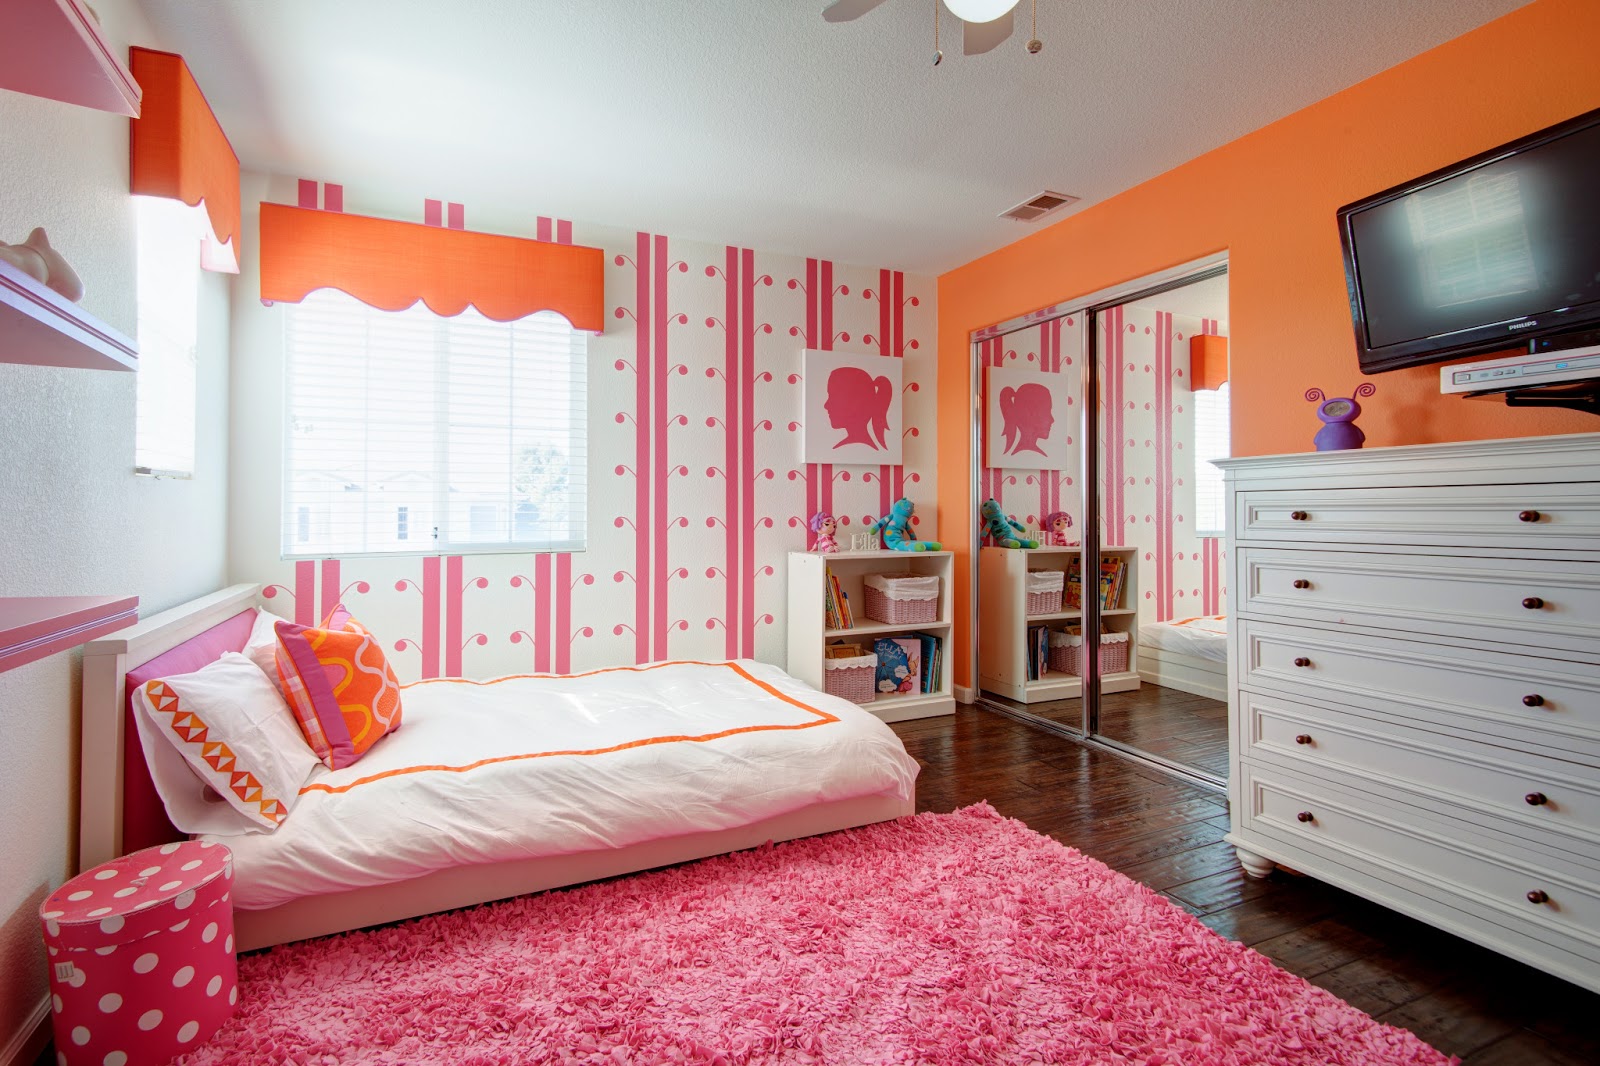
I began with a blank slate when Niki hired me to decorate her daughter Ella's room. Ella was ready for a teen space that could last her until she moved out of the house for college. Niki and Ella came into the store together with a lot of fun ideas for the room. They knew that they for sure wanted a graphic print on the wall and that they wanted bright colors. Ella wanted a platform bed that was low to the ground and a soft textured rug. We set to work and it all began with the wall pattern.

{Lauren Heinle Murals}
Nikki pulled pictures of a room that had a pattern very similar to this. Lauren interpreted it slightly different and I think its the highlight of the room! We decided to paint 2 of the walls in an orange to bring in more color.


{ Pottery Barn Teen}
In order for us to stay on the budget alloted, we ordered a dresser and desk from Pottery Barn Teen in a crisp white to tone down the orange wall. Ella had a storage problem in her old room so we added a hutch above her desk to allow for more storage for her school supplies.


{ Custom Bedding and Window Treatments Beach Bungalow Designs}
We purchased a platform bed from Pottery Barn Teen and added a pink upholstered panel inside the wood frame for a more custom appeal. The duvet was a white jersey cotton from the Company Store and we added an orange grosgrain ribbon for color. I found the sheets from Serena and Lily and loved the trim and how it tied in our patterns through out.  


{Silhouette Painting by Lauren Heinle Murals}
One of my favorite features of the room was the silhouette painting of Ella that Lauren did. I LOVE the pony tail!! It was the perfect artwork to hang over Ella's bookcase.


{ Pottery Barn Teen Shelves}
We had some basic Pottery Barn shelves painted the same pink as the graphic wall to hang next to Ella's Bed.  We plan to accessorize with some fun orange elements in the future. I can't forget the  bubble gum pink shaggy rug. The jersey cotton shag will be comfy under Ella's foot while providing a nice texture and splash of color for the room.


 Special thanks to the Bentley family for hiring me to design this room! It was so fun to create a totally different look than I have ever done before. And as always we are here at the Bungalow to make your dream room come true too!